The Southern Belles Icebox Key Lime Pie Recipe


So I promised this recipe about a week ago and then life happened! And then even more life happened after that and I even changed my entire blog name and everything. Now instead of the army wife I present to you the southern belle. 

Why? Good question. Military threats are serious. The war is serious. So when there are threats within our nation were flexible and we make changes, it comes with the territory honestly. So help me out and just roll with the punches with me so to speak and embrace the newness of the blog 🙂 

Now for that recipe I keep talking about!


You need exactly everything you see in the picture above:

  • 2 chocolate pie crust (the recipe just makes that much so yay more pie for you!) 
  • 1 tub of cool whip
  • 3/4 of a container of minute maid frozen limeade (thawed)
  • 1 can of sweet condensed milk
  • The juice from 2 limes

Mix whip all your ingredients together in a bowl.


It will be very creamy from the condensed milk!

Next divide the batter between your two pie crust.


Give them a little shake so that the batter evens out through the pan.

Then freeze those babies overnight, or for at least three hours if you just can’t wait!


And there’s your final piece! Enjoy.

Xo Savannah

The Southern Belle Shares A Craft Secret


Does the thought of trying to paint the perfect letters on your craft masterpieces give you anxiety? What if you accidentally move your brush outside of the lines, or sneeze while trying to paint a straight line?! 

If you can use a pair of scissors and mod podge then I have the solution for you! 

I use to spend hours upon hours trying to stencil in perfect letters just to mess them up in the end before coming up with this solution.

What you need:

A printer with regular 8×11 paper(the thinner the better!)

Mod podge glue and a paint brush

Scissors

Your craft project

Now what?

First print out your letter or phrase you want on your craft. For this particular one I am using the letter J.


Use your scissors to cut out.


Then time for mod podge, this is the kind I use, you can get it at any local craft store. I’ve had this $4.99 tub of it for almost three years now, you just never need to use that much of it at once so your money really goes a long way.


Keep in mind this dries clear, so don’t be afraid to get it on your projects. Simply brush the glue onto the section of your project where your lettering will go.


Place your letting down, and let the glue dry for about ten minutes.


Next go back over your lettering with another coat of glue to seal it all the way down.

Let dry another ten minutes, and then set with a clear sealer over the entire piece and you’re all done!


With your seamless lettering no one would ever assume you did anything else but hand paint it onto your masterpiece! 

Happy crafting!

Xo Savannah

The Southern Belles Matcha Shortbread Cookies Recipe


And the best part of this recipe is you can’t even taste the matcha, so all your picky eaters will eat this up! If you love the Girl Scout trefoil cookies you’ll love these too, very similar taste without the hard crunch.

So here’s what you need: 


Directions:

Cream together with a blender sugar, cream cheese, butter, vanilla, salt, and yolk


Next, add in flour a 1/4 a cup at a time. In your last 1/4 cup add matcha powder also.


After blending your mixture should look like the picture below.


Next, you’ll need two pieces of cling wrap. Divide your dough into two parts and put one each piece of cling wrap.


You can either leave it in a ball form when wrapping or roll it into a log as pictured below.


Refrigerate for one hour or longer.


Once done chilling in the fridge, cut into 1/2 rounds.


Place on baking sheet that has been sprayed with Pam and bake at 350 for 8-10 minutes or until bottoms turn brown.


And enjoy! These go really well with a nice warm cup of tea 🙂

Xo Savannah

The Southern Belles Meatloaf Recipe


4 ingredients under thirty minutes, you’re welcome! 

You need:

1-1.30 lbs of ground beef

1/2 cup of Quaker oats

1 can of tomato soup

1 egg

Directions:

Throw all your ingedrients into a bowl and HAND mix all the gooey goodness together, you end up with this:

                                  (Yummy, right? Hah!)

Moving along, everyone cooks their meatloaf into different forms and shapes it seems. Personally I like to spoon mine into a cupcake pan so that everyone gets their own mini personal meatloaf.


Then bake at 350 for 30 minutes exactly.


Now don’t forget your mashed potatoes and biscuits!!

Xo Savannah


The Southern Belle Tries A Matcha Green Tea Latte

..and it was deeeeee-licious (as one of my babies that I nanny woud say)! So I just have to share! 


Seriously, just three ingredients! Can’t beat that! So here’s the skinny:

Heat your 1/4 cup of water in the microwave till it’s nice and hot, not boiling just hot. The water is simply to dilute the matcha powder.


Pour your powder into the hot water and stir for a good long minute or two so you don’t end up with clumps of powder later.

Next, warm your milk up in the microwave to again hot, but not boiling. 

Now here comes the optional step of using a hand blender if you’re one of those people who like a latte with foam, and let’s be honest up who doesn’t? (But if you’re not then no worries just go ahead and pour your warm milk into your diluted matcha powder and you’re done!)


If you’re not familiar with a hand blender this is what they look like. Honestly in the three years I’ve had mine I’ve never used it until now. We all have at least one gift from our wedding that we’ve never used before right? Tell me I’m not alone here. So anyways..


Just plop that blender right into your measuring cup and blend for 1-2 minutes. Then pour your milk into your cup of diluted matcha powder and stir.


And there you have it, your at home Matcha Green Tea Latte! 

*side note, this latte does not have a super strong green tea flavor that will turn you off. If you like just a simple cup of green tea you will love this latte! There’s no funny business here at all flavor wise.

Xo Savannah

The Southern Belles Favorite Chicken Tenders Recipe

In my household, there’s no such thing as too much chicken. I can’t say that my husband is too thrilled with how much chicken we consume, but let’s be honest there are so many ways to cook it without fail! So it’s normally my go to for a simple and fast dinner. 

Now this is my most favorite way to cook chicken tenders in particular. Here’s what you need:


First mix all your liquid ingredients together in a bowl.


Next, toss chicken in mixture. I’ve found that letting the chicken marinade in the mixture for a more flavorful chicken isn’t necessary. Whether you simply toss and then cook or let it marinate overnight it taste the same with this recipe.

While your mixing your ingredients and tossing your chicken make sure to have your cast iron skillet (or regular pan) heating on the stove top on medium-high heat with a tablespoon of oil. 

Once your pan is good and hot place chicken in and let cook for about five minutes on each side (seriously, I wasn’t kidding when I said this is quick!). The temperature of your pan is crucial to get the nice golden brown coating on the outside of your chicken. It should look like this once done: 


Green beans and rice pair nicely with this.

Enjoy!

Xo Savannah

The Southern Belle Wants To Know..

IMG_0626

But seriously, it’s almost March, are you holding up your end of your New Years resolution? It’s only going to work IF YOU DO.

Now my pictures a little deceiving, I don’t do yoga but my family ended up having a little Facebook challenge after my sister successful accomplished this pose in her yoga work out (yay Scarlett!!). Progress always feels good.

As you remember from my last post we added Crossfit to our New Years resolutions goals of getting fit. And since I wanted to change my diet to build muscle I wanted to share some things that have worked for me, and see what’s working for you!

IMG_0624

I hope everyone whose changing their diets are really taking a good hard look at what they’re eating. I wasn’t so shocked at the picture above when I started researching ways to change my eating habits. I mean come on ladies, we LOVE our carbs and we won’t give them up even if it means being healthy and having a nice figure.

However, if you’re trying to put muscle on you don’t have to give up carbs! You still get to eat and enjoy them almost as much as before just with a little tweaking 😉

So all of this is called macro nutrient counting. Why did I choose this you ask? Because most Crossfitters have a paleo diet, and after looking into it and finding oh you have to give up dairy, I said no way Jose!

IMG_0620

Basically you can count your macronutrients for weight loss, weight gain, or weight maintenance.

First you need to start by calculating your macronutrients for one of the three. Simply go to: http://iifym.com/iifym-calculator/ and fill in the blanks and it will tell you down to the number of grams of each macronutrients you need and how many calories you also need to take in on a daily basis.

Next you just need to track your numbers every day. Which is easier than it sounds. I like the app below:

IMG_0623

Mostly because it’s super user friendly. Simple scan the barcode of what you’re eating and it will automatically fill in all the blanks for you to track your food for the day.

It will take time getting use to your new eating happens, especially if you’re trying to put muscle weight on, like myself.

Personally I have to take in:
70-90 grams of protein
270 grams of carbs
35 grams of fat
And around 1,600-1,700 calories a day

May not sound like a lot but for me it totally is! I am constantly eating all day and it’s taken me about a week to get on track with what I need to eat and at what time of the day to stay on track with my intake.

Now that I’ve finally gotten on track with the program my weight is no longer fluctuating so the next step is getting weight on, I’m hoping to start seeing results of weight gain to start as soon as next week!

Happy macro counting!!

Xo Savannah

The Southern Belle (And Husband Too!) Joined A Crossfit Gym

IMG_0614

So let me start by saying I’m officially laughing at my previous “work outs”. Going to the gym for an hour and a half doing 45 minutes of weight lifting and 45 minutes of cardio is NOTHING, I repeat NOTHING compared to the hell known as crossfit.

It all started when my girlfriend Anah said “hey come work out Saturday!” And I work out all the time so yeah sure! Next thing I know I’ve signed myself and my husband up for the gym she works at!

Saturday was an easy peasy work out I thought. Then after our first WOD class as members I officially hated myself and envied all the bodies in sight.

But I also love it even though I’m waddling from soreness like a pregnant woman.

IMG_0616

So WODS are the daily work outs which don’t look so terrifying until your told to do five sets of them within twenty minutes, then shit gets real, real quick. Especially when you’ve never ran before in your life like myself! (Seriously why are there no stationary bikes, I just want to spin!)

IMG_0617

However, I think what I love the most, even if I suck at it all, is all the new moves and work outs I’m learning. I’ve never done a dead lift before in my life, or “snatched” a dumbbell, or even wall ball burpees (don’t even ask).

IMG_0618

And not to mention too it’s probably the most fun having my husband there with me so I’m not suffering alone. Here’s to getting a crossfit body! Hopefully sooner rather than later, amiright?

And just for laughs here’s my “pre crossfit body” let’s hope there are abs there the next time I post an update..

IMG_0615

The Southern Belle Roasted A Turkey

Gobble, gobble, gobble! Turkeys are not just reserved for Thanksgiving, I promise. And why should you only eat it once a year when it’s so tasty! Now don’t get me wrong, I’ve had my share of dried up flavorless up turkeys but don’t let that turn you away from this turkey recipe. Roasting is the way to go for moist fall off the bone meat!

So what do you need?
Turkey(boneless or with bone)
1 orange
1 stick of SOFTENED butter
1 teaspoon Rosemary
1 teaspoon salt
1 teaspoon pepper

2015/01/img_0578.jpg(Rosemary not pictured but don’t forget you need it!)

First you need to preheat your oven to 275 and place your baking rack on the lowest setting.
Place your turkey in your roasting pan, pour one cup of water around the turkey, cover with tin foil, and roast for 10 minutes PER POUND for the first part of the roasting. (I had a 3 lb turkey so I roasted 30 minutes)

-side note if you don’t have a roasting pan, like myself, remember from my roasted chicken recipe simply ball up tin foil, place in pan, and set your meat on top, as seen below(the point is just to keep the meat above the drippings so that your meat doesn’t sit in the liquids, this is KEY):

2015/01/img_0580.jpg

2015/01/img_0581.jpg
Next, while your turkey is in the first step of roasting you can now make your specialty butter for the second part of roasting.

First you need to take the rind off of your orange and slice it into thin stripes. This can be done with a vegetable peeler and then a very sharp knife.

2015/01/img_0579.jpg
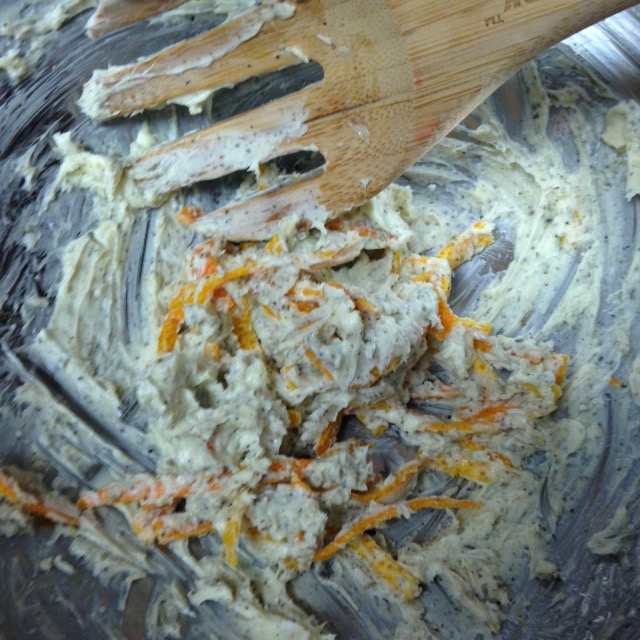
Then mix butter, orange peel, rosemary, salt and pepper together in a bowl.

2015/01/img_0582.jpg

2015/01/img_0573.jpg
Once your turkey is done with the first step of roasting take it out of the oven and spread your butter mixture all over!

2015/01/img_0576.jpg
At this point I also juiced my left over orange to add to the water in the bottom of the roasting pan, this isn’t necessary but I didn’t want to waste the orange, and I also think it added a very delicious twist to the gravy I made with the drippings from the turkey afterwards.

Before putting your turkey back in make sure you bump up the temperature to 350 degrees and place your baking rack back into the middle of you oven.

Place your half roasted and buttered down turkey back into the oven uncovered for another 15-20 minutes PER POUND to finish your turkey off.

Make sure after every 20 minutes to rub some of the drippings back on top of the turkey while it finishes.

And I don’t know about y’all but I never cook alone, here’s my little kitchen helper today ☺️

2015/01/img_0575.jpg

So once your turkey is almost ready don’t forget about your side dishes. I went with roasted carrots and brussels sprouts. Simple chop each up to your desired size, rub olive oil on top, and sprinkle with salt and pepper. I also like to add mozzarella cheese on top of my brussels sprouts the last ONE MINUTE of their baking time.

2015/01/img_0574.jpg
Once your turkey is out of the oven, set your oven to broil and 400 degrees and bake at 10 minutes with your rack as close to the top broiler as it will go.

While your vegetables are roasting cover your turkey with tin foil and let rest for ten minutes before serving.

And here’s your finished product!

2015/01/img_0577.jpg

Dinner is served! Enjoy!

2015/01/img_0572.jpg

Xo Savannah

The Southern Belle Makes A Valentine Door Hanger

And you can too! Here’s how:

Supplies:
Acrylic paints in your choice of colors
-I used black, white, pink, and red
Wooden letters
-I bought mine off of etsy.com(will share shop below)
Wooden backdrop for letters
-I purchased my heart backdrop from Hobby Lobby
Hot glue gun
And lastly Ribbon for a bow(optional)

Directions:
First, tape off your backdrop in whatever design pattern you’d like, I went with stripes but you could do anything from chevrons to polka dots.

2015/01/img_0568.jpg
Next, paint the sectioned off areas, let dry.

2015/01/img_0567.jpg

2015/01/img_0570.jpg
Retape and paint the remainder of your design.

2015/01/img_0566.jpg

2015/01/img_0569-0.jpg
Next, attach XO letters. I purchased mine from SignaturesSignsShape shop on Etsy.com and painted them red and pink.

2015/01/img_0563-1.png

2015/01/img_0564.jpg
Finally, add optional bow and string to hang on your door!

2015/01/img_0565.jpg
And there you have it, your very own Valentines door hanger! Get creative and have fun with it!

Xo Savannah